2012年6月3日 星期日

Create a survey in minutes from google drive


Have you setup any survey or poll in your blogger before? if you did, how much time you spent to set it up in your blogger. Today I learned a way to get it done in minutes and it is free, thank to the Google.
________________________________________

First you need to follow the google instructions to enable the google drive, then you should be able to see the following.


You can create different kind of documents, here we want to focus on creating a form which can be used for simple survey in your blogger and have interaction with your reader.
The following step by step process demonstrate how you can simply set that up.

Step1: click on "Create", select "Form" from pull_down menu.


Start to setup your questionnaire for the survey, refer to the following figure.
1. Write your subject and purpose
2. Have more detail description for supporting the subject and purpose.
3. Start to add your question
4. Select what type of answer and how it can be done, for example, a blank for Text entry, pull-down menu, multiple answers for selection…
5. Check if this answer must be answered


Here you can see the example for setting different type of answers.


Step2: After adding all your questions, it is time to generate HTML code which will be used to embed in your web page.

Click on “More actions” on up-right corner, select the "embed" as the following figure, you should see a window popup with HTML code.


Copy the HTML code by press CNTL-C for later usage.


Step3: Select“Edit confirmation” under the "More actions", you can configure the response message to notice the reader he or she has completed the survey.


Edit the confirmation response as following and save it.


Finally, Save the form you just create, at this point, you have completed setting up the survey.

Go back to Dreamweaver, find the right location to copy the HTML into the source code, you should see something like “<iframe src="https://docs.google.com...</iframe>”, press F12 to test the result.

You should be able to start testing and answer the questionnaire in your web page, then submit it.
How you think so far? does this process for creating questionnaire surprise you? here comes even more powerful tool, stay tune...

Now you may wonder where the data went, and how I can collect them and analyze.
Do not worry, Google has thought that out for you.
In your Google drive, you should see a file created and named by your header for questionnaire, see the following.


Click on it, you should see the data collected with excel format, and you can download the data to your computer, see the following.


I am not going explain how you can process your data and what tool you can use, you are the expert.

One more thing to mention here, you can setup the notification rules by going to “Tool” select “notification rules” as following.


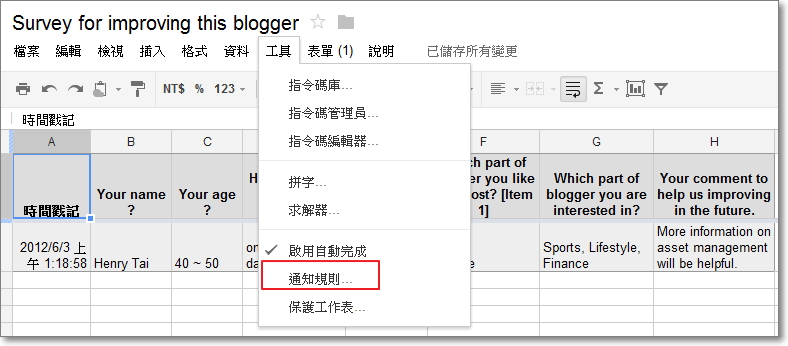
What this function does is how you would like to be informed when any data about this form changed, see the following, this setting is pretty straight forward, it should not be a problem for you.


End of introduction, hope you enjoy it.


2012年5月5日 星期六

Putting Google+, Facebook, Plurk and Twitter all together

If you are a heavy user to all different type of community networks, and you have created user account for Google+, Facebook, Plurk, Twitter and weibo, you may wondering how I can reach all the accounts at once if you have post or message to send to your friends. Should I login to each account and send a post? that will be time-consuming and definitely will drive you crazy. Here is a good new, here is going to show you how you can put them all together.
We will target to complete the following networks integration, so that you send a message in Google+, the same message will be sent to other networks at almost same time.
圖片 3
Reminder: You can only configure all these integration on Google Chrome because the Plus Plurk only work on Google Chrome.


2012年5月3日 星期四

Test - publish post and google+ sharing

Go to "Posts and Comments" under the settings in Blogger administration
Configure the following to enable post sharing to google+
g 3
After you complete your post and publish, you should see the following window popup.
Write your recommandation and click share.
g 4
Go to your Google profile home page, you should be able to see your recommandation as well as your friends as following

g 5


2012年5月1日 星期二

Embed a google map onto your post

Locate a place you would like to embed in google map.

Click on "Create web link" icon as following.
mp1

Customize your own map by clicking "customize and preview".
map2

A customization window open, you can configure you map size by change the width and height as following.
map3
On the bottom of the window, there is HTML code, you need to mark the whole area and make a copy by  pressing  CNTL-C at the same time.
map4
Go to Blogger administration, write your post, Before you want to copy the HTML code to embed the map you just copy, change to HTML mode first by click on HTML as following.
map5

Copy the HTML code onto the article, it will looks like the following.
mp6

Switch back to Writer mode by click "Compose" mode as following.
mp7

Continue your writing, and publish the post when you complete.


2012年4月29日 星期日

Publish photo in Picasa to your google Blogger

In Picasa, select a photo you would like to publish and come along with it’s story.

On right side, you should be able to see the following.
Click on Blogger icon, system will bring you to edit mode with the photo presented.

photo2

After completing your story for the photo, and select the right blogger on top-right corner you would like to publish to.

You can publish the post right away, see the following.

photo3


Embed MSN into your google Blogger

Have your MSN account information ready.


Login on Windows live messeger http://settings.messenger.live.com/Applications/,

Click on “Web Settings”

msn1

Check the box and do not forget to Save.

 
msn

Click on “Create HTML”, chek “IM window” for generate HTML.
msn2


Before you generate the correct HTML code, you can configure the window size as well as color, see the following, and copy the HTML code for late usage.

msn3
Now you have the HTML code, go back to your Blogger administration, create a “HTML/JavaScript” box, and paste the HTML code on content aera as following.
Do not forget to save the change.
msn4 
You have now create a MSN live on you Blogger as following.
msn5


2012年4月27日 星期五

Payment mechanism


How customer pay you when they purchase goods from your web store.

There are several ways to complete the payment transaction.
  • Web  ATM  fund transfer
  • Virtual account fund transfer
  • Pay at convinience store like 7-11, Family
  • Pay thru 7-11 ibon, Family Famiport
There are companys setup up to provide these type of seervices, for example ezPay and SmikePay.

You can work with these companys to setup the payment mechanism for your web store. You will have to configure properly for your products so that the buyer can be link to ezPay webside when they place the order.

Here is two examples to show how it can be done.

You can create the link with Keyword, so that buyer can just click the keyword and can be link to ezPay for further process, see the  example as following.

Example 1:
Make a link on ezPay with https://aquarius.neweb.com.tw/CashSystemFrontEnd/ezpay/ezpayshop.jsp?merchantnumber=455287

Pay thru ezpay , you can try to click on ezpay. you will understand.

Example 2:
Make a link on NT$1500 with  https://aquarius.neweb.com.tw/CashSystemFrontEnd/ezpay/ezpayshop.jsp?merchantnumber=455287&amount=1500

You will need to pay for NT$1500. you can try to click on NT$1500, you will see the different from example 1.


Photos slideshow on your google Blogger

Go to  https://picasaweb.google.com/home 
You should have your photos ready in Picasa

Before Integrating photos into your blogger, make sure photo books are public, so that they can be accessed from the your google blogger.

Go to Blogger administration, click on “Adding a Gadget” in layout as following.


Adding Tool

Add "Slideshow" as following
photo player

Select Picasa Web Albums, enter your username (Google account)
System will link to your Picasa automatically, so that you can select which Album(more than one Album) you would like to show by clicking the pull-down icon as following.
Do not forget to save to complete connection.

photo


Embed video in post using Windows live writer

On tool bar click on “insert – video” in Windows live writer.
Insert Video 


Select video from your youtube channel, you need to provide username and password for login
Youtube channel

After you login on Youtube, system will show what videos are avaliable in your youtube channel, so that you can select and insert to your article as following, you can also embed the video from your computer(second tab) or from the network(you need to provide URL).
Select video


Complete


Shorten your URL -for sending short message purpose

Google has a utility to help user shorten your longer URL, for example, http://www.blogger.com/blogger.g?blogID=5564973398241667535#editor/target=post;postID=1033660212798659222

Go to http://goo.gl/
url3

Copy your original URL to the blank, see the following.
url
        url1           


Click "Shorten URL", the utility will generate short URL, see the following
.url2


You can try the URL you just generate, it will bring you same website.


Transform any format of video to WMV format -not complete

Using FormatFactory SW

Step 1: Select “any format to WMV” on left side selection
Step 2: Add new file for transforming
Step 3: Select output folder for output file
you3

you5

you6

you7


2012年4月26日 星期四

Add RSS subscription in google blogger - not complete


Mapping your google blogger to Google analysics

https://www.google.com/analytics/web/provision#provision/SignUp/

Sign up your account in Google Analysics, get your Account name and Blogger website address ready, see the following.

Enter Account name and Blogger website
Analystic
You will receive a tranking ID, record it for late usage.
Analystic2
Put the tracking ID to Settings-Other “Google Analysics” as following
Analystic4
Do not forget to Save it.


Related Posts Plugin for WordPress, Blogger...